Shocks do not support the weight of the chassis. They dampen the travel of the chassis up and down by controlling compression and rebound. This helps keep the tires in contact with the track and stabilizes the suspension. A piston connected to a rod, works against shock oil in the shock body. As the suspension moves up and down, the oil is force through holes in the piston. This slows the suspension travel down. The amount of resistance will depend on the weight of the shock oil and the volume allowed to flow through the piston.
Rebuilding your shocks should be performed on a regular basis depending on your race schedule. Some will tell you to rebuild after every race but most do it far less. If you notice your shocks are leaking at the lower part of the shock body, it's a good indication that it's time to rebuild them.
The first step of rebuilding your shocks is to remove your shocks from your car. Next remove the spring retainer nut. Now slide the spring off the shock body. Next remove the studded rod-end (some have a shock cap) and dump out any oil that is in the shock body. Be sure not to lose any small pieces that may have come loose as they can often be reused if you remove the shock cap first.
Next remove the e-clip(s) from the shaft. I use a small flathead screwdriver and place it in between the e-clip and the shock shaft. Now you can to remove the piston head. Another route, you can remove the rod end on the end of the shock shaft, and push it through the shock cap. In order to remove the rod-end you have to hold the shock shaft, which usually involves pliers. Careful: This can scratch up the portion of the shock shaft that moves in and out of the shock. A scratched shock shaft will leak. You will also need to use pliers when reassembling the shock shaft. I place a rag or fuel tubing in the pliers jaw when gripping the shaft. After the shock rod has been removed, you'll need to turn the shock body upside down and let it drain. Now remove the o-rings and any spacers inside the lower part of the shock body.
Now that you've disassembled your shocks, you should thoroughly clean the parts and inspect them for excessive wear. You will need to have shock replacement parts on hand when you perform the rebuild. This includes the o-rings and other items you may need to replace as well, such as bent e-clips or the piston head. If your shocks are leaking inspect the o-rings for cuts or nicks. Even if you don't see any problems with the o-rings it is generally best to replace them as even small defects can cause a leak.
Another item that should be inspected is the shock shaft itself. A bent or scratched shock shaft can lead to leaks. If the shaft is bent it should be straightened or be replaced. Check the rest of the shock as well. Any parts that are worn or cracked should be discarded. Take the time to clean all the parts of the shock before beginning the reassembly process. Pay close attention to the holes in the piston head. If the piston has holes designed into it, then check the holes for debris. The holes can sometimes get clogged up, and if that's the case, you should make sure the holes are clear.
To reassemble the shock first coat the lower o-rings and any spacer with shock oil, and then return them to their spot in the lower portion of the shock body. Next you'll want to slide the shock shaft into the shock cap. Before sliding the shock shaft in place, put a little shock oil on it as well to ensure that you don't damage the o-rings. Then gently slide the shock shaft up into the shock body. The picture below shows the proper order in which the components are reinstalled, which is the reverse of how we disassembled. If you find it necessary to use pliers to hold the shock rod still, either keep them on the rod threads, or use some fuel tubing over the ends of a pair of needle nose pliers.
After reassembly is complete, it is time to fill and bleed the shock. You will fill the shock body up with the shock oil of your choice. Fill the body up to about 1/16 inch of the top. Then slowly move the shock rod up and down. Continue doing this until you don't see any more air bubbles in the shock fluid. Finally screw the shock cap back into place.
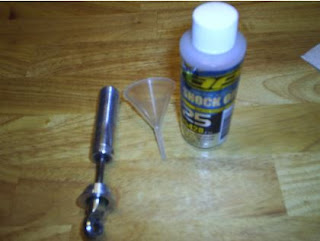
A nice little tool to have for shock bleeding is a tiny funnel such as the one picture below. These can be picked up at beauty supply shops or plastic supply companies.
Shock Oils:
I prefer Associated Shock Oils over any on the market but this is my own preference. Depending on track conditions and seasonal temperatures, you may never change from one weight of oil to another. I have stuck with the same weight oils per shock position for several years. Shock oils come in many weight variances. Typically quarter scales shocks will use oil weight ranges from 10 to 80. Once again, this will be personal preference. There will be basic setups added on the article page that can help you choose the right oil for your car.
Quarter Scale Shock Rebuild Download
Quarter Scale Shock Rebuild Download


